Photography Tips
A-A+
Outdoor Photography
I perceive photography as a personal view, complemented by technique. You should be observant, recognize a special light, and capture sensations.
It is difficult to think of all aspects when you shoot outdoor, where the environment is unpredictable. Concentration and practice yield improvement.
Shoot many pictures; select only the best to show others.
Composition
Plan the image equilibrium, the location of all objects in relation to the background, the colors, and filling the frame.
- The optimal location of the main object is in the horizontal and/or vertical third. Still, sometimes symmetry has a strong impact.
- The background should complement the composition. Try different angles to change the background.
- Leave space in front of the living or moving object.
- Shoot flowers and kids from their own height.
- Do not crop organs such as a finger, a hand, an ear or a leg. Consider carefully how to trim close-ups.
- Include lots of dramatic sky, rather than foreground.
- Place people in landscape photographs. I prefer to include people who wear bright colors. People add life, point of interest, human sense of scale, and color.
- Frame your object, e.g. shooting through a window, or adding a bush or a branch in the foreground.
- Avoid excessive unfocused foreground.
- The shadow and the reflection are part of the picture. Consider their angle, and try not to crop them.

Lighting
Photography is all about light, and outdoors the light is ever-changing. When you see a special light – rush to capture the fleeting moment. Later a cloud will cover the light-source, or the sun will change its angle.
- Afternoon light is warm and dramatic. During twilight the sky is deep blue. Dawn light is also soft, if you can wake up.
- Direct light is hard, whether it comes from the sun during the day, or from a flash. The direct light washes-out the colors, and the image seems flat. Reflected light is defused, soft, and yields better results. Turn the flash to the ceiling or at a rock, so the reflected light will illuminate the subject.
- Partly cloudy makes a great photograph also during the day.
- Pent light which is reflected several times inside a gorge creates impressive effects.
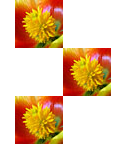
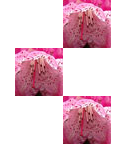
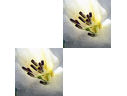
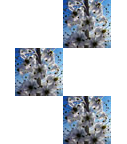
- A great effect is easily obtained when you shoot a flower against the sun; the light penetrates the petals, while you aim the camera downwards.
- Use a makeshift reflector to illuminate the shaded side of a flower or face. You can create a reflector by wrapping a piece of cardboard with aluminum foil, using its matte side as your reflector (thanks to Amikam Shoob for the tip).
- When you do not have time to take a good measure, it is better to overexpose a bit than to underexpose. In post processing it is easy to darken the picture, but when brightening, you lose the deep colors.
Portraits
I ask people for their permission to take their photograph in advance. I respect beliefs, and request to invade their privacy. Friendliness rewards with warm reaction which is reflected in the picture. A smile adds sensation to a photograph.
- Focus on the eyes (same when you photograph animals).
- When the faces are dark or shaded, use the flash also in daylight. The flash should be set to minimum light, and use a diffuser.
- When shooting inside, make sure the light or its reflection is on the face of your portrait. Do not shoot when your object is with his back to a door or a window.
- Natural soft light flatters faces more than a bright sun, a flash or other artificial light source.
- Picture from the face height, in an equivalent to 70mm lens, and ask your object to lower his chin a little rather than lift it.
Stability
Make sure the camera is stable and supported.
- Use a crook of a tree, a rock, or your knees, as a base for your camera or your hands.
- In AF mode, always shoot in two steps: first press the shutter button halfway down, to allow the camera to focus, and then continue pressing fully down to take the picture.
- Take a big breath before shooting, hold your breath, squeeze gently the button as described above, and wait with your breath until after taking the picture.
- Use the self timer to avoid vibration while squeezing the button.

Camera Setup
Outdoors you do not have the time to set up the camera. Prepare presets in advance.
- Set to the lowest ISO (usually ISO 50-100), as it means also low noise images.
- Set the white balance to cloudy, to increase the reds and yellows resulting in richer, warmer pictures.
- Set to the highest resolution (you can resize in post processing).
- Set to the highest image quality (you can decrease quality in post processing).
- Focus area (AF area) – spot, in the center only, for complete and fixed control of what will be in focus.
- Metering mode (measuring the frame brightness) – center weighted, to avoid extreme light in the background affect the measurement.
- Prepare a set for low light (sunrise and sunset twilights).
- Prepare a set for low speed, to capture a flowing movement (e.g. a flow of a river).

Outdoor Photography Equipment
Consider the equipment you take according to the travel conditions.
- A small tripod, as sometimes using a large tripod is prohibited, e.g. inside mosques, churches and caves.
- Power
- Take an extra battery.
- Use new batteries, as old batteries are emptied quickly in extreme cold conditions.
- Take an external instant power battery to charge the camera battery (and so forth. You should check with the airline if you need to store it in your handbag or luggage).
- Take a DC to AC Power Inverter to charge with a car's cigarette lighter adapter.
- Take a DC to AC Power Inverter to charge from a solar generator.
- When electricity is not available, charge your battery each time you have electricity (though it is not recommended in normal use).
- To save battery, use the viewfinder and not the LCD, do not delete pictures while trekking, turn the camera on only when required, and turn it off immediately after shooting.
- Storage capacity
- Pack extra memory cards (old cards are slow in writing time).
- Connect your camera to a computer in an Internet Café, or any other computer you find on the way, and delete undesirable photos from your memory card. You will earn storage space, you will reduce sorting work at home, and you will be able to email one or two pictures during the trip.
- Pack a hard drive to back up your memory cards (e.g. the Hyperdrive), or USB Flash Drive to back up in Internet Cafe.
- Upload photos to a web album (e.g. Google Photos).
- Take a cleaning gel or wet towels to clean your hands before dealing with the camera.
- Attach a small led flashlight to the camera, to see the camera in the dark.
- Pack the camera's user's manual, to check how to use special features (it is better to learn about night framing before it is getting dark).
Photography Under Extreme Cold Conditions
- When the frame contains much bright snow and ice, there is a problem with light measurement. Overexpose by using a spot metering from the darker parts, and check the results immediately. When photographing a close object in a bright background, consider adding a fill in flash.
- Use manual focus in snow and fog conditions, when the camera fails to focus automatically.
- Clean the lens and the display using dry, soft cloth, as breath will turn into ice.
- Pack some extra new batteries, as the batteries lose their potential quickly in extreme cold conditions (in particular non-fresh ones).
- Pack extra (at least two) memory cards, designed to perform in extreme temperatures, with fast write speed (e.g. SanDisk Extreme Pro Memory Cards, high performance from -25°C to 85°C). Redundancy is the name of the game.
- Make sure the camera does not get too cold, and don't keep it exposed unnecessarily. Follow the manufacturers' instructions. Keep extra batteries close to your body.
- Put the camera inside a sealed bag when you enter a warm room. This way the bag's exterior will condensate the wetness, not the camera. If the camera becomes misty, remove the battery and memory card, leave their compartments open, and allow them to dry out.
- Use a sealed camera bag, to keep the camera dry when it rains, snows, or when you slip in the snow.
- Use Silica Gel bags to absorb wetness inside the sealed bag and the camera bag. Dry the Silica Gel bags with heat (e.g. in a microwave).
- Photography Under Arctic Conditions article by Kodak.

Outdoor Workshops
My friends and I attended successful photography workshops with:
Did you find a mistake? Do you have a comment? Your feedback is important, so I can focus on what interests you.
You are invited to proceed to reading the Image Processing Tips, Backpacking Tips, Best Treks Tips, Touring Israel Tips, Internet Tips, or to browse the Photo Galleries